
Go Power AGM RV Battery - Deep Cycle - Group 27 - 6V - 224 Amp Hour
(4 reviews)
Price: $319.99
Go Power AGM RV Battery - Deep Cycle - Group 27 - 6V - 224 Amp Hour
Item # 34277606
Retail:$408.45
Our Price: $319.99
You Save: $88.46
In Stock


- All Info
- Reviews (4)
- Q & A (0)
- Videos (1)
- Photos
Go Power Battery - 34277606
- RV Battery
- AGM Battery
- 225 Ah
- 6V
- Group 27
- Go Power
- 10-1/4L x 7-1/8W x 10T Inch
This deep cycle AGM battery provides reliable, long-lasting power for your RV. AGM construction prevents battery acid spills and minimizes maintenance. Capable of longer life and faster charging than flooded lead acid batteries.
Features:
- AGM battery provides long-lasting, dependable power for your RV
- Deep cycle process allows the battery to be repeatedly charged and discharged
- Great choice for solar charging systems
- Low internal resistance allows the battery to charge quickly
- Charges up to 5 times faster than flooded batteries
- AGM construction prevents battery acid spills and minimizes maintenance
- Fiberglass mats keep acid absorbed and contained within the case
- Internal structure allows battery to be stored longer without charging
- Automatic valve regulated release prevents rupturing from internal pressure
- Vibration resistance helps keep your battery functioning properly on rough roads
Specs:
- Type: AGM
- Capacity: 224 amp hours
- Battery group: 27
- Voltage: 6V
- Operating temperature:
- Charge: -4 F to 122 F
- Discharge: -4 F to 140 F
- Storage temperature: -4 F to 140 F
- Dimensions: 10-1/4" long x 9-3/4" tall x 7-1/8" wide
- Weight: 67.25 lbs
- 2-Year warranty
GP-AGM-224-6V Go Power! Sun Cycle Solar Battery - AGM - 6V - 224 Amp Hour - Group 27 Replacement
Installation Details Alternate Instructions


Video of Go Power AGM RV Battery - Deep Cycle - Group 27 - 6V - 224 Amp Hour


Videos are provided as a guide only. Refer to manufacturer installation instructions and specs for complete information.

Video Transcript for Go Power Sun Cycle Solar RV Battery Review
Hi there our viewers. Today, we're going to be taking a look at Go Power's, Sun Cycle, AGM, six volt RV battery. Now these do come as a quantity of one, we're currently installing six today. If you are replacing, I highly recommend that you replace it in pairs of two, so you've got two batteries that are new hooked in series to ensure you've got the maximum capacity. And if you are going to be replacing some banks with some dead batteries, especially if they're very old, I would recommend replacing the entire battery bank. As if you've got maybe four new batteries, but two old ones in here, these old ones are going to drain their capacity sooner than our newer ones and that's going to decrease the life of our newer batteries.
So they're going to have to make up the Slack from our weaker batteries. It can also affect the way that our batteries are being charged, because they're going to charge at different rates as well. And that can also decrease the life of our newer batteries because of the strategy it's using to get everything charged.Unlike our original batteries, which we're a flooded battery that do have caps on top so you can add fluid. These are completely sealed AGM batteries. What's nice about them being completely sealed, especially for you at home with your ordering them.
It does exempt them from being a hazardous material. So it does reduce the shipping costs, getting these to your house. If we remove our cap, we can see the electrolyte inside. Our AGM's are going to be completely sealed so we're never going to see this, and this is here so we can top these up if we need to, to perform maintenance on our batteries, while our AGM we're going to be completely maintenance-free with everything sealed inside.Another great benefit of having AGM batteries is that they're going to last quite a bit longer. And this is mainly due to the fact that they can be stored without needing a trickle charge or anything to keep them up.
Unlike your regular flooded lead acid batteries. Those about every six months, you're going to want to put a top charge on them to prevent sulfation. Inside of our AGM batteries, we have a fiberglass mat that's in there that helps minimize the sulfation process. So that way these can be stored for a significantly longer period of time without needing to be topped up. You can see how our regular lead acid batteries that we had installed, they got all corroded, they've likely been in here for a long time.
And if you don't maintain that top off charge, they can begin to sulfate inside, which can cause the batteries to start to leak, which then causes corrosion and it just kind of spirals out of control. And you get into the situation where you have a very costly repair.Another benefit of AGM batteries over flooded lead acid is that they're going to be a little bit lighter per size. So it does help minimize how much you are having to lift in here and how much you're hauling around with you in general. They also are capable of deep cycling. So they're going to be able to use more of their capacity while maintaining a longer life cycle. Typically with our AGM's here, we could discharge it about 80% and our regular flooded lead acid, we only want to charge them to new about 50% before we recharged them because beyond those points, we're going to start decreasing the life of the battery.And AGM batteries have the capability of at about five times faster than regular flooded lead acid batteries. That being said, one of the things you do need to be careful about with AGM batteries, since they are completely sealed, they don't like high temperature, quite as much as your vented batteries do. You can see we've got a temperature sensor here, and that's why we wanted to make sure our solar charger on the inside is set for AGM. So that way it has the appropriate charge strategy. So it's not overcharging these and causing them to overheat and potentially damage the batteries. So if you have an appropriate system for charging them, you really don't have any negatives to it. If you don't though, then you could potentially run into those issues. So you may want to look at an appropriate charger or inverter. We've got plenty of available here at etrailer.com from Go Power, so you can get a nice matched set that's going to get these charged up properly and lasting a long time.Now, all batteries, typically they decrease in performance as it gets down to extreme colds, but with our AGM batteries, they're going to withstand those cold temperatures better than your regular flooded lead acid batteries. Another benefit that we're going to get with these AGM batteries over the flooded lead acid, we took out, these have a capacity of 224 amp hours. Versus our old batteries only had a capacity of 216 amp hours. So we are getting a little bit more storage capacity per battery while maintaining the same footprint in our RV.And last, I just wanted to talk about the difference between a six volt and 12 volt battery, because your system's going to run on 12 volts. So you're probably wondering why don't I just get a bunch of 12 volt batteries Well, the reason being why you would want to go with six volts over 12 volts is that you can typically get a higher capacity out of six volt batteries than what you're going to get out of a 12 volt battery. Many of your 12 volt batteries are only going to be around a hundred amp hours while we're getting 200 out of this six volt battery here. That being said, the downside is that we do have to have two, six volt batteries wired in series to get that 12 volts. But if you're looking for a higher capacity than what you had before, this is definitely going to provide more than our 12 volts or any of the 12 volt competitors will.This is going to be a quick and simple upgrade from your regular flooded lead acid batteries. It's going to help increase your capacity and also give you just a nicer, cleaner area in here because they're not going to be vented and they should last a longer time without leaking out and causing all that corrosion we had before. Now that we've talked to about some of the features here, why don't you follow along with me and we'll show you how we got them installed.So you can see our original batteries here. Corrosion has taken a hold of all of our cables, so we're definitely going to get all that cleaned up here before we get them installed. And we're replacing them because we've got some dead cells in some of our batteries. So we might as well just replace them all while we're at it because if you have an old battery in here, that's weaker and you go replace it with newer batteries, those newer batteries are going to be working harder. So they're going to diminish their life faster than they would normally if you had all fresh batteries in here. So that's why we're replacing them all at the same time.For this corrosion here, one of the quickest and easiest ways to get this off of here is actually just to use water. I just got done running it through the coffee pot. So it's nice and hot and it will just melt this stuff right off of here. One of the ways I really like to do it is if you've got a small cup, you can take these cables off. We're probably going to be doing that here later, but you can just see how it's just melting it away. And I'll get a small cup here and we'll take this off and you just poke that in there and just jiggle it around in this hot water that's really going to make a big difference. We'll get the hose out here in a minute, and we're just going to spray all this off afterwards. We're just trying to get the bulk off first so we can get these nuts off and then we can clean them up further after that.Yeah. The stuff just melts away under this warm water. And if you're getting that stuff that's thick on the end of your cables, just take a cup and put some of that hot water in it. And then when you take the cable off, you can just dip it down in that cup and it'll sit in there and you can kind of slosh it around and that'll really melt this away.And you can see here how much better it looks. You do want to make sure you take this hose to it afterwards because that hot water does melt that stuff off there pretty good, but it is going to run down and it's going to be sitting in your tray. So that's why we want to make sure we take the hose to it, to get all that out there so that corrosion doesn't spread any further.And you can see we've got that bulk off of there it all looks pretty good. There's a little bit left on our cable ends here, but kind of like what I mentioned earlier, when I go to take these batteries off, I'll just toss this in a little bucket of hot water, just like we hadn't swash it around and that's going to come out spotless in the end there.Now, if you've got a little bit of moisture still on here, it's not a big deal. This is just, these are six volts and they're going to be wired for 12 volts and with such low voltage, you're not going to have to worry about any shocks or shorts or anything like that. We're going to start by removing the main battery cables first. So we've got our positive here and our negative, we'll start with our negative. The size you're going to use is going to vary, for ours, it's going to be a half inch. You want to do the negative side first, just because if you accidentally touch anything that is grounded, when you're taking off the positive side, if the negative side is still attached, you can cause a little short, and it'll cause some sparks with your wrench here, and you don't need to scare yourself and cause any damage to anything. So we've got the negative side off of there. Now, now we're going to remove the positive side.We can then just set these cables aside here. We also have a battery current sensor here, and sometimes it's a temperature sensor. So this is. It could be both current and temperature, but we do want to make sure we remove this as well.Now that we've got all the components disconnected from the bank, we can just start getting these batteries removed and then wiring them back up. Now, since we are working with a six volt system. So this is what's known as a series parallel circuit. And if you're using six volt batteries, this is pretty much what you're going to have because we need 12 volts to run the things inside of our motor home. So in order to get 12 volts out of a six volt battery, that's why wire the two in parallel putting our positive to our negative like this. And then these two, basically making this one giant 12 volt battery is what it's doing. And this is your new positive, and this is you and your negative. So we're wiring these two in the same way so we've got one giant 12 volt battery now, and one giant 12 volt battery here. And we wire these giant 12 volt batteries in parallel with one another. So they share their capacity, but we do the series here to step that voltage up from six, with a single one to 12, with the two. So you've got three pairs of 12 volts if you look at it like that.Now when you're cleaning up your cables, what I was doing here, you can see, we had quite a bit on there still that was left over. I just took it in that hot water, dumped it in a little pan here and just swashed it around and it just ate it right off. But what we do notice here is that this cable is corroded away to where there's almost nothing left here. So we're going to make sure that we replace this cable as well. Because this is just going to continue to spread corrosion since it's got the cavity ate out in it and like that. It's kind of just like your teeth at home, once it gets bad, there's no point in filling this in, we just need to replace it. This one here looks like it's going to be okay it cleaned up pretty nice. You just want to check each one of your cables and make sure that none of them need to be replaced.If you need a replacement cable, you can get one here at etrailer.com. So we're going to start now, we've got our batteries set into place, we've just kind of laid the cables out where they go just so we've got an idea of where everything needs to be. We're going to start by hooking the batteries in series, making our three 12 volt banks here. Your batteries do come with new hardware. You want to make sure you have the flat washer and a lock washer on there. And we're just going to thread that into one battery and then the other end. This is the positive on one battery, we're going to hook the other end to the negative on the other battery. We're going to be doing our banks, just like this. It is going to pretty much look just like it did before we started. Just going to get the hardware we need for that one, just bend that over into place. And then we're just going to loosely tighten this down. We can tighten them all the way down at the very end. We're just going to get everything kind of set up for now.After we finish the center ones, we just wired the outside ones back up how we had taken them off, hooking up our main lines last, making sure to also get that temperature sensor hooked back up then you can get it clamped down. When tightening these down, you don't want to over-tighten it because you can damage the top of the battery. So you just want it until it's snug to where these batteries aren't jiggling around until they're in there and then you're good. We're going to tighten these down and the bolts that come with your hardwares are going to use a half inch. When tightening these down, I am using a power tool, but I do recommend that you just run it down to the surface and then finish it up with a wrench so you don't accidentally over-tighten. So as soon as it hits, I'm just stopping with the power tool right there.Now I'm just going to double-check it with the wrench to make sure it's nice and snug. You probably are going to have to snug it down a little bit more if you just stopped at the surface because we want it to be snug, but you can see there, it's not very much that I'm going on because we don't want to over-tighten these and strip out our batteries. Because since these don't have a stud on top traditional batteries, if you strip off this bolt, it's very difficult to re-tap these out and put a new bolt in just because the metal is so soft.Now that we've got the batteries hooked up, we do want to make sure that any of our chargers are set for the appropriate battery that we've installed the batteries we previously removed we're flooded batteries with caps on top. So they weren't AGM batteries that are completely sealed. So we need to make sure that our charger here is set to the correct strategy. So your charger is going to vary, but you'll want to find the battery type on your charger and make sure that you have it set for AGM. If you have it set for a flooded battery, it could potentially overcharge your batteries and cause some issues, so we want to make sure we're there.If you have a solar controller, you'll also want to make those changes on your solar controller, because typically, you have a separate controller for your shore power charge like this. And one for how the solar charger is going to be charging your batteries.And since we've got everything set for the charge strategy and our batteries installed, you do you want to make sure it's all working properly. Previously with our old batteries in, the steps weren't working, but with our new batteries installed, we've got our 12 volt functionality back. Our lights are on inside in our motor home. So we're now back up and running again. And that completes our look at Go Power's, Sun Cycle AGM, six volt, RV battery..
Customer Reviews
Go Power AGM RV Battery - Deep Cycle - Group 27 - 6V - 224 Amp Hour - 34277606
Average Customer Rating: 4.8 out of 5 stars (4 Customer Reviews)
This deep cycle AGM battery provides reliable, long-lasting power for your RV. AGM construction prevents battery acid spills and minimizes maintenance. Capable of longer life and faster charging than flooded lead acid batteries.by: Patrick11/19/2021
The best accessory I have ever added!!!! if you don't have solar for your RV... you'er living in the dark ages Quiet, oderless unlimited power
by: 11/09/2023
by: Charlie12/06/2020
Item as Described, Easy Transaction, Fast Shipping Would Buy Again
by: Allen08/31/2021
4
4
See what our Experts say about this Go Power Battery
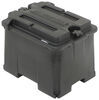
- Battery Box for Running Two Go Power Sun Cycle Solar RV Battery # 34277606The dual battery box part # 329-HM426 would fit two of the Go Power Sun Cycle Solar RV Battery # 34277606 that you referenced. The outside dimensions of the box are also compatible with the space you mentioned having as well.
view full answer... - Running Accessories from Trailer Battery and GeneratorBasically you would just need to run everything including the generator to the trailer battery as this will ensure that when the generator is running it would be powering everything as well as charging the battery but when the generator isn't running the smaller accessories could still power from the battery. Sounds like you have a generator already, but we have AC units like the Furrion part # FR92PR as well as batteries like the # 34277606. We don't have any wiring diagrams, but like...
view full answer... - Battery Boxes Capable Of Holding 6V LifeLine Battery GPL-4CT On Trailer TongueFor 6-volt battery boxes we have a couple options to hold your two 6V lifeline GPL-4CT batteries. I was able to see that this battery is 10.28" long, 7.06" wide and 9.92" tall. First is the Commercial Grade Battery Box # 329-HM426 which is designed to hold 2 6 volt batteries. The interior dimensions are 14-5/8" long, 10-1/2" wide and 11-1/2" tall. The Exterior is 17-15/16" long, 14-5/16" wide and 14" tall. Next the TorkLift PowerArmor Solar Locking Battery Box # TLA7712RS will allow...
view full answer...
Do you have a question about this Battery?
Info for this part was:

Expert Research:
Jameson C

Video by:
Dustin K

Video Edited:
Chris R

Updated by:
Wilson B

Edited by:
Daron K

Installed by:
David F

Written by:
Alex H
At etrailer.com we provide the best information available about the products we sell. We take the quality of our information seriously so that you can get the right part the first time. Let us know if anything is missing or if you have any questions.
Product Experts Available Now!
Call 1-800-940-8924
Thank you! Your comment has been submitted successfully. You should be able to view your question/comment here within a few days.
Error submitting comment. Please try again momentarily.